• $105.99
  • Free 30-day Returns
  • Ships from China.
    Price alert
    Sold by honour_2

    Shipped by honour_2

    Shop it at NeweggBusiness.

    Meet Your Seller

    M402-RK Maintenance Roller Kit for HP Laserjet Pro M402 M403 M426 M427 Separation Pick Up Roller

    • Maintenance Roller Kit
    • Compatibility: M402-RK Maintenance Roller Kit Compatible with HP Laser Printer M402 / M403 / M426 / M427
    • Easy Installation: User-replaceable, making maintenance simple and convenient.
    • Superior Performance and Reliability: Precision engineering ensures smooth, consistent paper handling, minimizing jams and misfeeds for uninterrupted productivity.
    • Maintenance roller kit includes:1 x RM1-4023 Transfer Roller, 1 x RL2-0657 Tray 1 Separation Pad, 1 x RL2-0656 Tray 1 Pickup Roller,, 1 x RM2-5397 Tray 2 Pickup Roller, 1 x RM2-5452 Tray 2 Separation Roller, Gloves
    +
    +
    Overview
    Specs
    Reviews
    Press the door-release button, and then open the toner-cartridge door.
    Release two tabs between the roller collar and roller, and then rotate the top of the roller out and away from the printer.
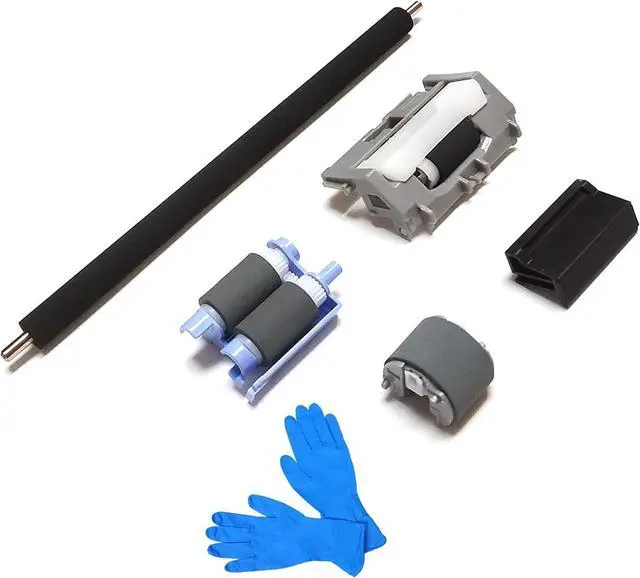
    Remove the roller.
    The M427/M426 printer is shown in this procedure. However. the instructions are valid for the M403/M402 printers. Position the replacement pickup roller with the pins in the provided slots on the holder, and then rotate the top of the roller up and toward the printer.
    Continue to rotate the top of the roller toward the printer (callout 1), until two tabs (callout 2) snap into place.
    Close the toner-cartridge door.

    Pull the tray straight out of the printer to remove it.
    Remove the pickup roller assembly (Tray 2)
    Place the printer bottom-side face forward
    Release one tab (callout 1), and then slide the roller holder toward the left side of the printer to release it.
    Remove the roller holder.
    Position the roller holder assembly in the printer as shown, and then slide it toward the right side of the printer.
    Make sure that the tab snaps into place.
    Carefully rotate the printer forward.
    Continue rotate the printer forward until it rests in the operational position.
    Install the tray

    Warranty & Returns

    Warranty, Returns, And Additional Information

    Warranty

    • Please contact the Seller directly for warranty information. Warranty information may also be found on the Manufacturer's website.
    • CONTACT

    Return Policies

    • Return for refund within: 30 days
    • Return for replacement within: 90 days
    • This item is covered by honour_2 Return Policy

    Manufacturer Contact Info

    LOADING...